Whistleblowing
A confidential channel where anyone can report a concern, and a case workspace where authorised investigators triage, assign and work each report without learning who sent it.
Whistleblowing in Aegis has two sides that never meet. There is a
public intake page, open to anyone with no sign-in, where a
person describes a concern and may choose to leave no name. And there is the
case workspace at /whistleblowing, where a small
group of senior staff work each report. The design follows the
EU Whistleblower Directive (a European law,
2019/1937, that obliges organisations to offer a safe reporting channel and
protects the people who use it). The reporter's statement and any contact
details are encrypted at rest (scrambled in
storage so they cannot be read without authorisation), and revealing an identity
is a separate, permission-gated, recorded action.
Who uses it
The public intake page has no role — it is for anyone, inside or outside your
organisation. Where the module is switched on for your organisation, any
signed-in colleague can also reach it from the left menu, under
Privacy & Whistleblowing → Report a concern.
Inside Aegis, the case list and case detail are Manager-tier.
Manager holds every case
permission in the table below, and
Admin holds them too.
Contributor and
Viewer have no access at all: the
route checks the Manager role on the server before the page is built, so a
Contributor who opens /whistleblowing never reaches the case list.
That narrow access is itself a protection for reporters.
| Action | Permission | Who has it |
|---|---|---|
| Submit a report | None — public, no sign-in | Anyone |
| View cases | whistleblow:read |
Manager, Admin |
| Change status, reply, attach files | whistleblow:update |
Manager, Admin |
| Assign an investigator | whistleblow:assign |
Manager, Admin |
| Reveal reporter identity | whistleblow:view-identity |
Manager, Admin |
A reporter may submit a concern without giving any contact details — that report is genuinely anonymous and there is nothing to reveal. Where someone does give a name, it is encrypted and hidden by default; an investigator sees it only by choosing to reveal it, which needs the identity permission, asks for confirmation first, and is recorded. Take care never to copy reporter-identifying details into other records, messages or reports.
What's on this screen
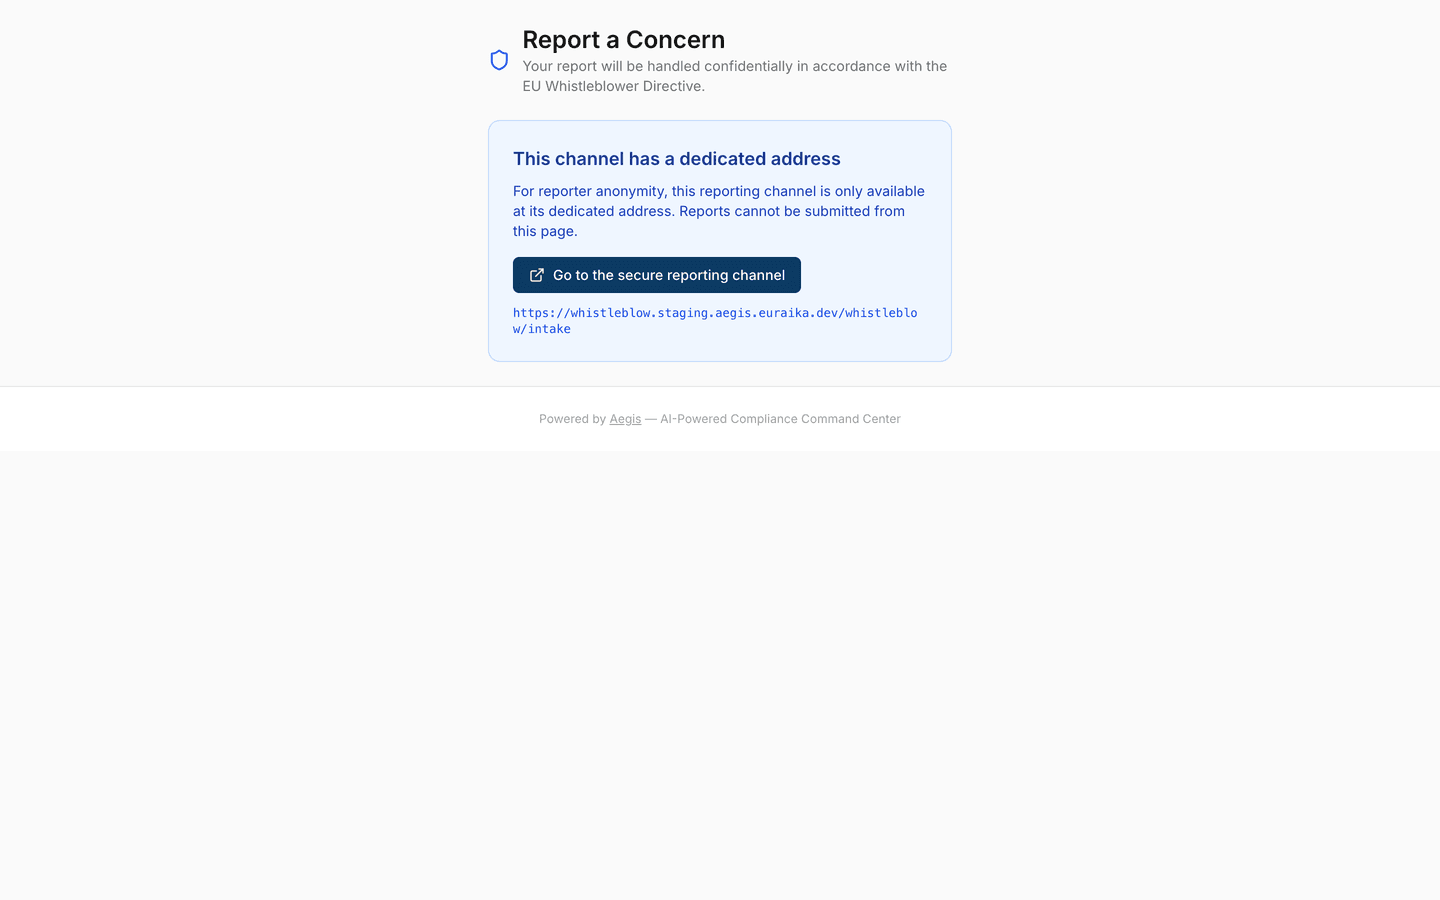
The intake page is served at /whistleblow/intake and needs no
account. To keep the channel separate from your everyday Aegis address, it
accepts reports only at its own dedicated web address — a
whistleblow. host. Open the same path on the main application
address and the form is not shown at all.
That is what the screenshot below captures. At the top, a blue shield sits
beside the heading
Report a Concern and the line about confidential handling under the
EU Whistleblower Directive. Below it, a blue-bordered notice headed
This channel has a dedicated address explains that reports cannot
be submitted from this page, and offers a dark
Go to the secure reporting channel button with the full dedicated
address printed in plain text underneath it. A
Powered by Aegis line closes the page. There is no navigation, no
menu and no sign-in link anywhere on it — by design, a reporter sees nothing but
the channel.
-
Read the notice under
This channel has a dedicated address. It confirms you are on the right service but the wrong address, and that a report sent from here would not be accepted. -
Select
Go to the secure reporting channel. The browser moves to the dedicatedwhistleblow.address, where the reporting form itself appears in place of this notice. - If you would rather not follow a link, copy the address printed underneath the button and open it yourself. It is the same destination, shown in full so nothing is hidden.
When you advertise the channel — on an intranet page, a poster, a supplier
contract — publish the whistleblow. address. That is the one
that accepts reports. The intake, follow-up and reporter case pages are all
kept out of search-engine indexes.
Reporting a concern
On the dedicated address the same page shows a short form on a narrow card: a
Category dropdown, a What happened? box, a bordered
Your identity (optional) panel and a full-width submit button. That
form is not among this chapter's screenshots, so the steps below describe it
without a figure; Report a concern covers
the reporter's side in full.
-
Open the
Categorydropdown, which starts onSelect a category, and choose the type of concern:Fraud,Harassment,Discrimination,Safety,Anti-Money Laundering,Data Protection,CorruptionorOther. The chosen value replaces the placeholder. -
In the
What happened?box, describe the concern in your own words. The prompt text asks for dates, locations and the people involved where you can give them. The box accepts a long account — up to 50,000 characters. -
Optionally fill in the bordered
Your identity (optional)panel, which holds four boxes —Name,Email,PhoneandRelationship to the organization. A note above them says that giving your identity is voluntary and that anything entered is encrypted. Leave all four blank and the report carries no identity at all. -
Select
Submit Report. The button stays disabled until both a category and a statement are present, and readsSubmitting...while it works. On success a greenReport Submittedpanel replaces the form, showing theCase NumberandRecovery Codewith aCopy to clipboardbutton and an amber warning that the code is shown once.
The case number and recovery code together are the only way back into the report. There is no account, no password and no reset: lose the code, and the reporter can no longer read replies or add to that case. Copy both before leaving the page.
Following up as a reporter
The reporter returns at /whistleblow/return, headed
Check Report Status. This page is not among this chapter's
screenshots either, so the steps describe it from the live page.
-
Type the case number into the first box — its placeholder shows the expected
shape,
WB-A3F9K2— and the recovery code into the second. -
Select
Access Report. The button readsVerifying...while it checks. If either value is wrong, one red line readsInvalid case number or recovery code.and nothing else changes; there is no clue as to which of the two was wrong. -
Once verified, the page shows the case number, the line
Your report statuswith the current stage, and the sameMessagesthread you write into — each entry labelledReporterorInvestigatorand time-stamped. A reply box sits below it. AtClosedorPurgedthe reply box is gone and the thread is read-only.
What's on this screen (the investigator case list)
Authorised investigators work cases from /whistleblowing, reached
from the left menu under Privacy & Whistleblowing →
Whistleblowing. For a Manager or Admin the screen opens with the
heading Whistleblowing and the line
EU Whistleblower Directive (2019/1937) compliance. There is
deliberately no "new case" button: cases exist only because
someone used the public channel. Beneath the heading sit two dropdowns —
Status and Category — and below them the case table,
with a column each for Case Number (a link into the case),
Category, Status (shown as a pill),
Assigned Investigator (a dash where nobody is assigned) and
Legal Hold (a badge only where a hold applies). Where more than one
page of cases exists, a footer shows the total and Previous /
Next buttons. With no cases, the table is replaced by a shield and
the message No cases —
There are no whistleblowing cases to display.
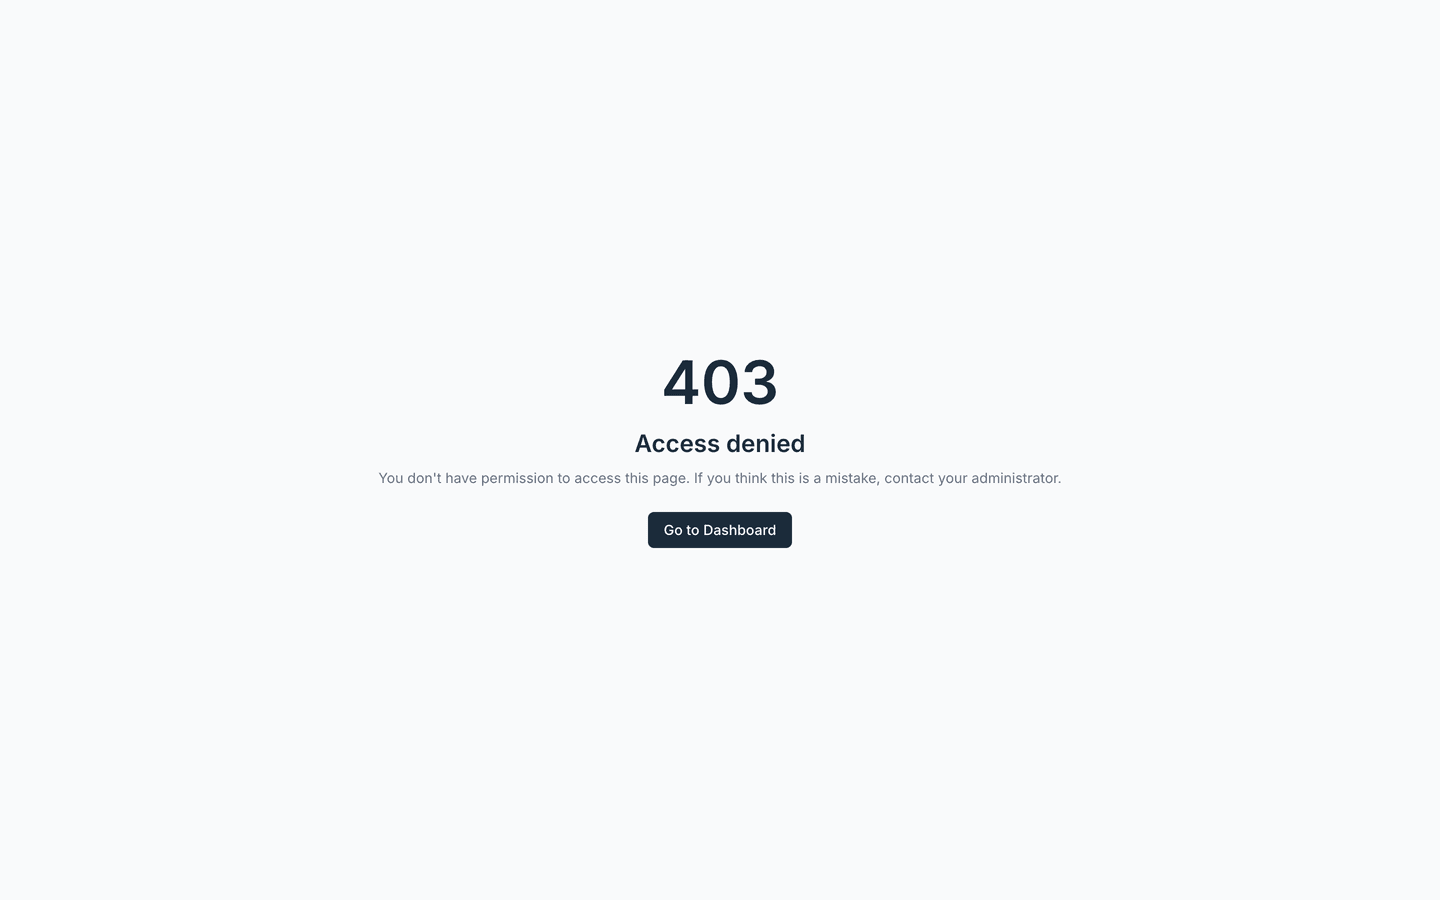
The screenshot below shows the same route opened by a Contributor, and none of
that appears. Because the page checks the Manager role on the server, the
account is stopped with a large
403, the heading Access denied, the line
You don't have permission to access this page. If you think this is a
                        mistake, contact your administrator.
and a single Go to Dashboard button. This is the expected
behaviour, not a fault — and it means a Contributor cannot tell whether any
cases exist at all.
-
Open
Whistleblowingin the left menu. If your role is Manager or Admin, the page opens with its heading and the two filters, and the case table fills in a moment later as the cases are fetched. -
If your role is Contributor or Viewer, the page below is what you get
instead: a
403andAccess denied. No case data is loaded, so nothing about the queue is revealed. -
Select
Go to Dashboardto return to your home screen. If you believe you should have access, ask an administrator to review your role — see What each role can do.
Filtering the case list
-
Open the first dropdown, labelled
Status, and pick one ofNew,Triage,Investigating,ActionedorClosed. The table reloads with matching cases and paging returns to the first page. -
Open the second dropdown, labelled
Category, and pick a concern type. The two filters combine, so aTriageplusFraudselection shows only cases that are both. Re-selecting the first entry in either dropdown — the one that readsStatusorCategory— clears that filter again. - Select a case number in the first column to open the case. Nothing else in the row is clickable.
Working a case
A case number opens the detail page at
/whistleblowing/<case>. The header carries a shield, the case
number, a status pill, the category and — where one applies — an amber
Legal Hold badge, with the Change Status button at the
top right. The wider left column holds up to three panels:
Reporter Identity (present only if you hold the identity
permission), Reporter Statement and Messages. The
narrower right column holds Case Detail — assigned investigator and
Retention Until date, with the
Assign Investigator control below them — and
Attachments. This page is not among the captured screenshots for
this chapter, so the steps below describe it without a figure.
-
Move the case on. Select
Change Statusat the top right. A short list drops down containing only the moves that are valid from where the case stands now, and choosing one updates the case and confirms with a brief message. The control disappears entirely atPurged, where no move remains. -
Assign an investigator. In the
Case Detailpanel, selectAssign Investigator. A scrollable list of colleagues drops down; picking one sets them as the assignee, and their name then shows both here and in theAssigned Investigatorcolumn of the list. -
Read the reporter's account. The
Reporter Statementpanel shows the decrypted statement as it was written, with the reporter's own line breaks preserved. Where a report carried none, it readsNo statement provided. -
Reply to the reporter. Type into the box under the
Messagesthread and selectSend Message. Your message joins the same thread the reporter sees on their follow-up page, labelledInvestigator; theirs are labelledReporterand tinted blue. Until anyone writes, the panel readsNo messages yet. -
Add supporting files. Select
Add Attachmentin the attachments panel and choose a file — up to 100 MB. A larger file is refused before anything is uploaded. Uploaded files are listed by name and size; where none exist the panel readsNo attachments. If object storage has not been configured for this deployment, the message names the setting an administrator needs to fix. -
Reveal the reporter's identity, if you must. In the
Reporter Identitypanel, select the amberView Reporter Identitybutton. A confirmation asks you to acknowledge that viewing the identity will be logged as the directive requires. Confirm, and Aegis decrypts and shows whatever the reporter supplied —Name,Email,Phone,Relationship. Where the reporter stayed anonymous, the panel readsReporter chose to remain anonymous.
The case stages
A case moves through a fixed set of stages, and the
Change Status menu offers only the moves that are permitted from
the current one. The path is not a one-way line — investigation can step back to
triage, and a case can be closed early.
| Stage | Moves available from here |
|---|---|
New |
Triage |
Triage |
Investigating, Closed |
Investigating |
Actioned, Triage, Closed |
Actioned |
Closed, Investigating |
Closed |
Purged |
Purged |
None — the case is at its end |
The AI assist
There is none here, and that is deliberate. Whistleblowing is a human-only workflow in Aegis: no AI triage, no automatic routing, no machine reading of a reporter's statement. Every status change, assignment, reply and identity reveal is a decision a named person makes, and the record shows who made it.
Tips and limits
- Cross-case access is prevented by construction. A reporter's link is checked against one specific case before the page loads, so editing the address to another case is refused and sent to a generic expired-link page that says nothing about why.
-
Case content does not live forever. Each case shows a
Retention Untildate — set to seven years from the day the report arrived — and a background job purges cases that have passed it, in line with the directive's data-minimisation expectations. The job only purges a case that is already atClosed; one still open is skipped and left as it stands, so an old case does not disappear mid-investigation. ALegal Holdbadge marks a case that must be preserved past it: while the hold is on, the retention job skips the case and a move toPurgedis refused. There is no button for the hold yet — the badge is display-only, and the flag is set through the case API, so ask an administrator to apply or lift one. - The reporter's error messages are deliberately vague — a failed submission or a wrong recovery code says only that it did not work. That protects the channel, but it also means a reporter with a genuine problem has nothing to quote back to you.
- The permissions in the table above are separate, so an investigator can be given case access without the ability to reveal identities. Handling a case at all requires Manager or Admin; there is no read-only view of the queue for a Contributor.
-
The module is also licence-gated. If whistleblowing is not switched on for
your organisation, a Manager still reaches the page and sees the heading and
the two filters, but the request behind the table is refused before it reads
anything — so the area below stays blank, with neither a table nor the
No casesmessage. That is a licensing state, not an empty queue. - A channel supports your obligations under the directive; it does not discharge them. Acting on what is reported, protecting the reporter from retaliation, and meeting the acknowledgement and feedback deadlines remain your organisation's responsibility.
Where this connects
The reporter's side of this channel is written up separately in Report a concern — share that chapter, not this one, with people who may need to use the channel. Every identity reveal, status change and assignment is recorded; The audit log explains how that trail works. Reporter contact details are personal data, and the retention thinking here mirrors the rest of GDPR. Who can open a case at all is set by role — see What each role can do. Where a report turns out to describe a security event rather than misconduct, it will usually be worked on as an incident as well, and a matter that names a colleague may also involve HR.