Connect Microsoft Entra ID
Everything the previous chapter's SSO section needs from the Microsoft side: register an application in your Entra tenant, add a client secret, put groups in the token, and hand the four resulting values to Aegis.
Aegis speaks standard OIDC (OpenID Connect — the sign-in protocol built on OAuth 2.0), so it works with any compliant identity provider. This chapter walks the most common one, Microsoft Entra ID (formerly Azure Active Directory), click-by-click in the Entra admin centre. You need an Entra role that may register applications — Application Administrator or Global Administrator — and an Aegis Admin account for the final step. The screenshots show a real registration performed against a test tenant; your tenant's names and identifiers will differ, the controls will not.
At the end you will have four values for the Aegis
Add Provider dialog:
-
Issuer URL —
https://login.microsoftonline.com/<tenant-id>/v2.0 - Client ID — the registration's Application (client) ID
- Client Secret — a secret value you mint under the registration
- Group object IDs — for the group-to-role mappings (Entra puts group identifiers, not names, in the token)
Register the application
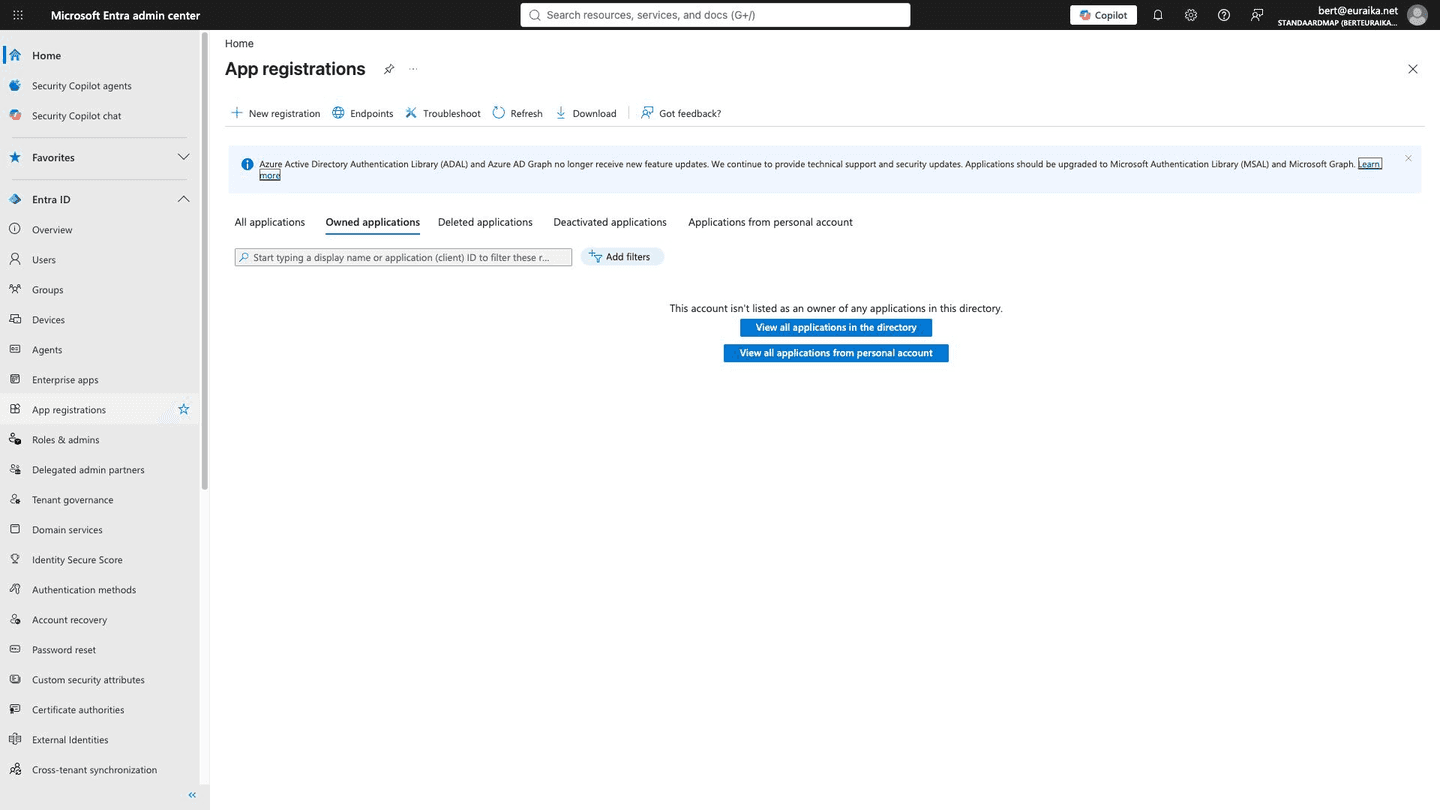
Sign in at entra.microsoft.com and open
Entra ID → App registrations. The list shows the applications your
directory already trusts; Aegis will be a new entry.
- Select
New registrationin the toolbar. -
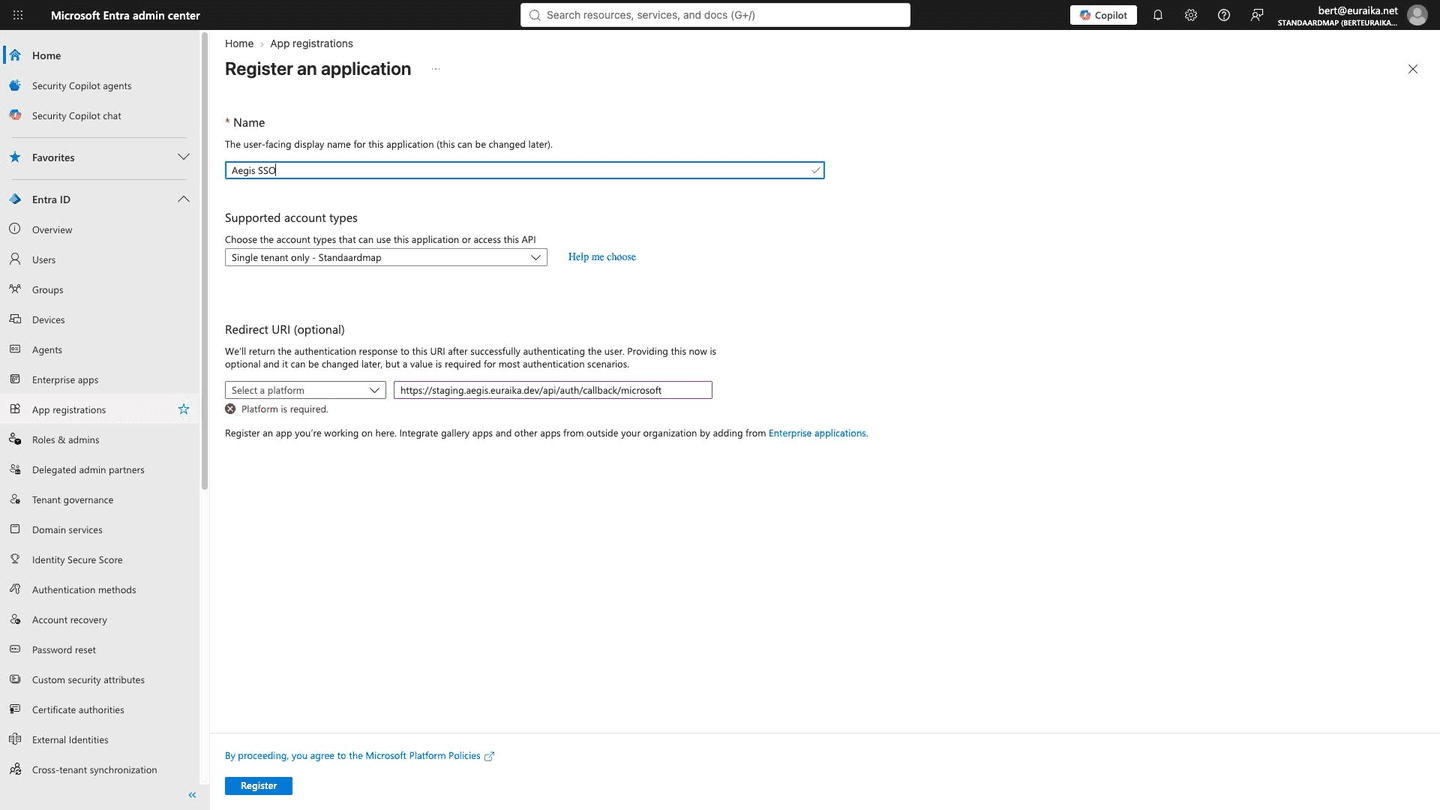
Name the application after the service —
Aegis SSOis a sensible choice; the name appears on the Microsoft consent screen your colleagues see at first sign-in. -
Under
Supported account types, keepSingle tenant only— only members of your own directory may sign in to Aegis. -
Under
Redirect URI, choose theWebplatform and paste the callback URL from the Aegis dialog —https://<your-aegis-host>/api/auth/oauth2/callback/<provider-id>. The AegisAdd Providerdialog shows this exact URL with aCopy callback URLbutton, so open it side by side and copy rather than type. - Select
Register.
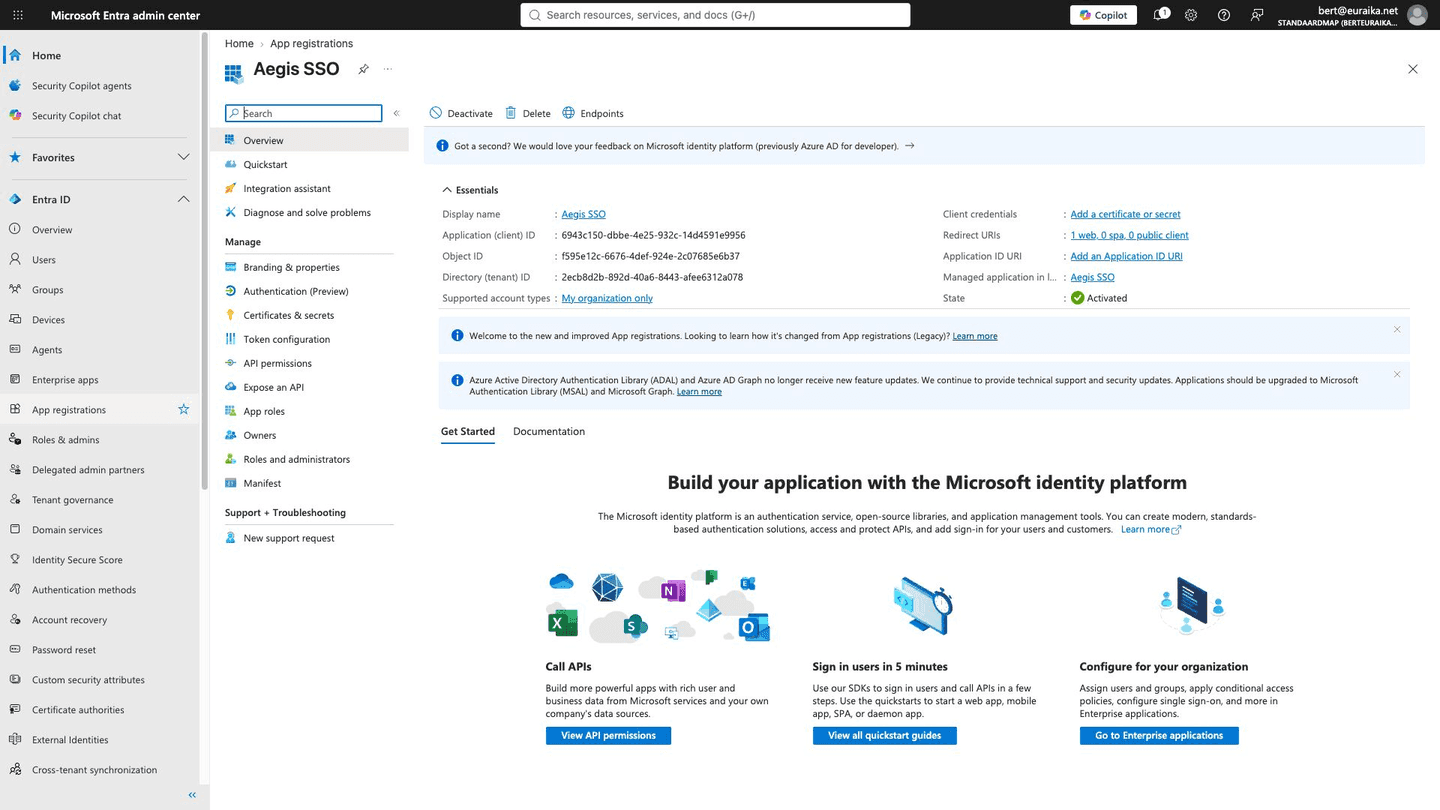
The registration's Overview page then shows the two identifiers
Aegis needs: Application (client) ID — the
Client ID — and Directory (tenant) ID, which
completes the Issuer URL (https://login.microsoftonline.com/<Directory (tenant) ID>/v2.0
— the /v2.0 suffix matters).
Mint a client secret
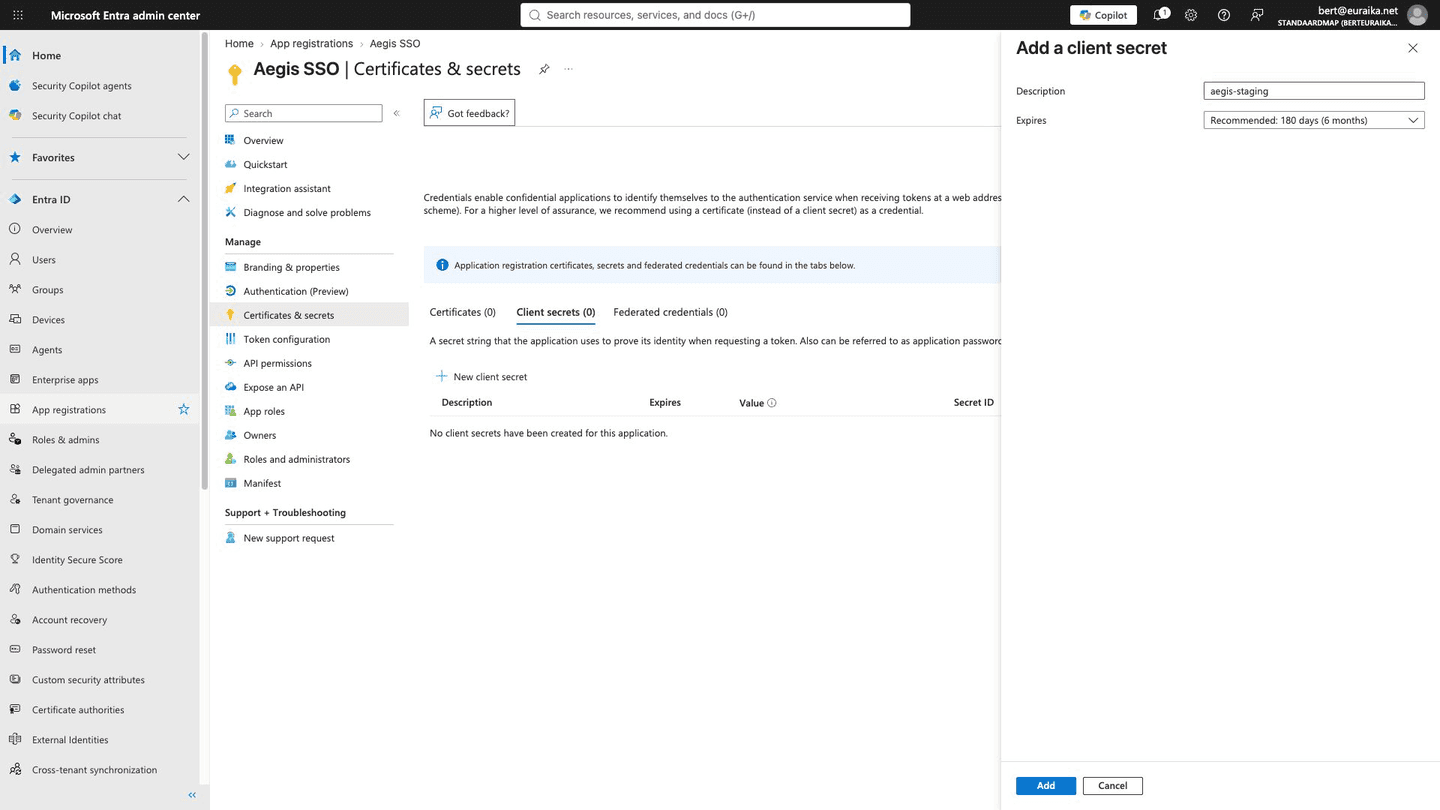
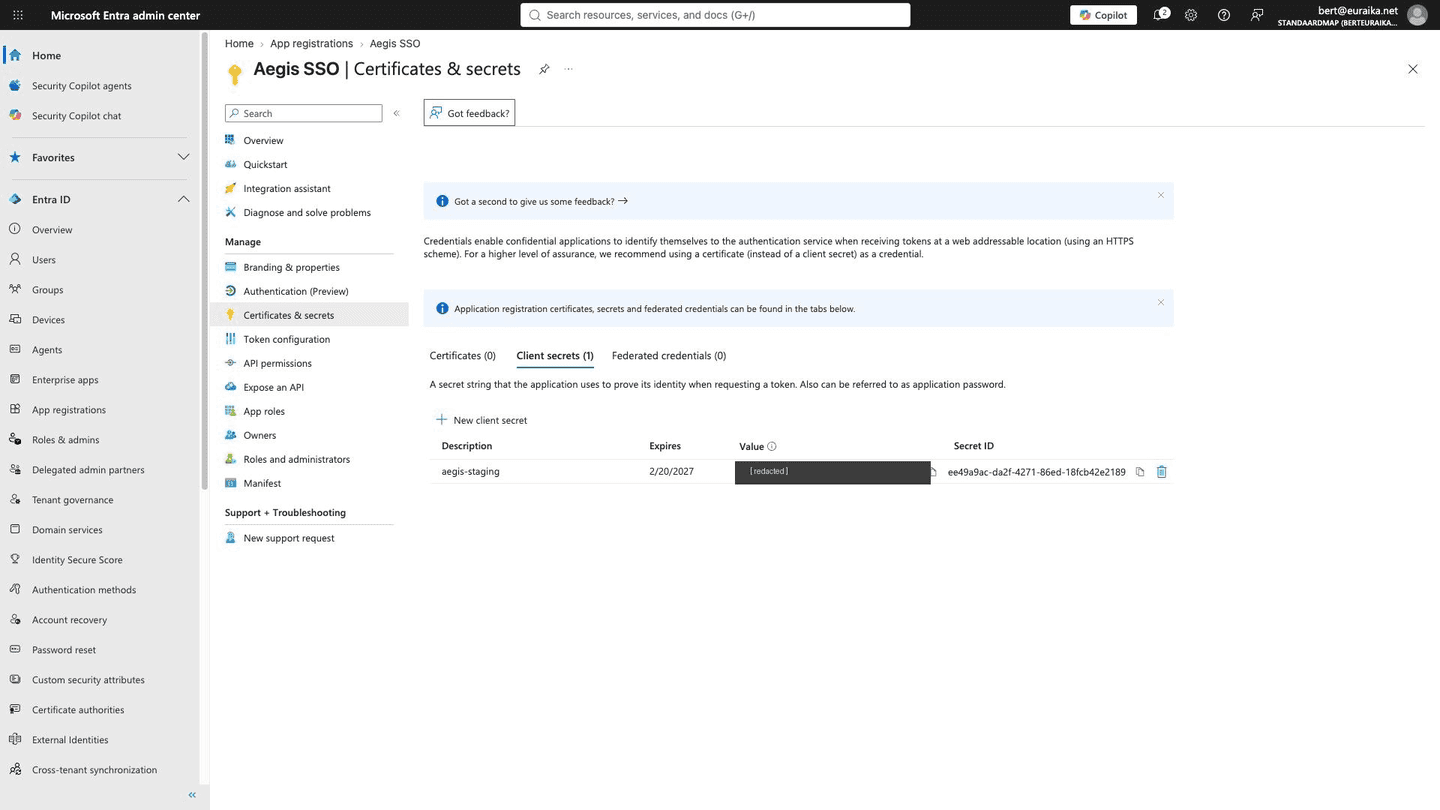
A client secret is the password Aegis uses to
prove itself to Entra when it exchanges a sign-in code for tokens. Open
Certificates & secrets in the registration's menu.
- Select
New client secret. -
Describe it after the environment it serves (for example
aegis-production) so a future rotation is traceable, pick an expiry, and selectAdd. Entra caps secret lifetimes at 24 months — put the expiry date in your team calendar, because sign-in stops when it lapses. -
Copy the
Valuecolumn immediately — it is shown once, never again. This is the Client Secret for the Aegis dialog. TheSecret IDcolumn is not the secret.
Put groups in the token
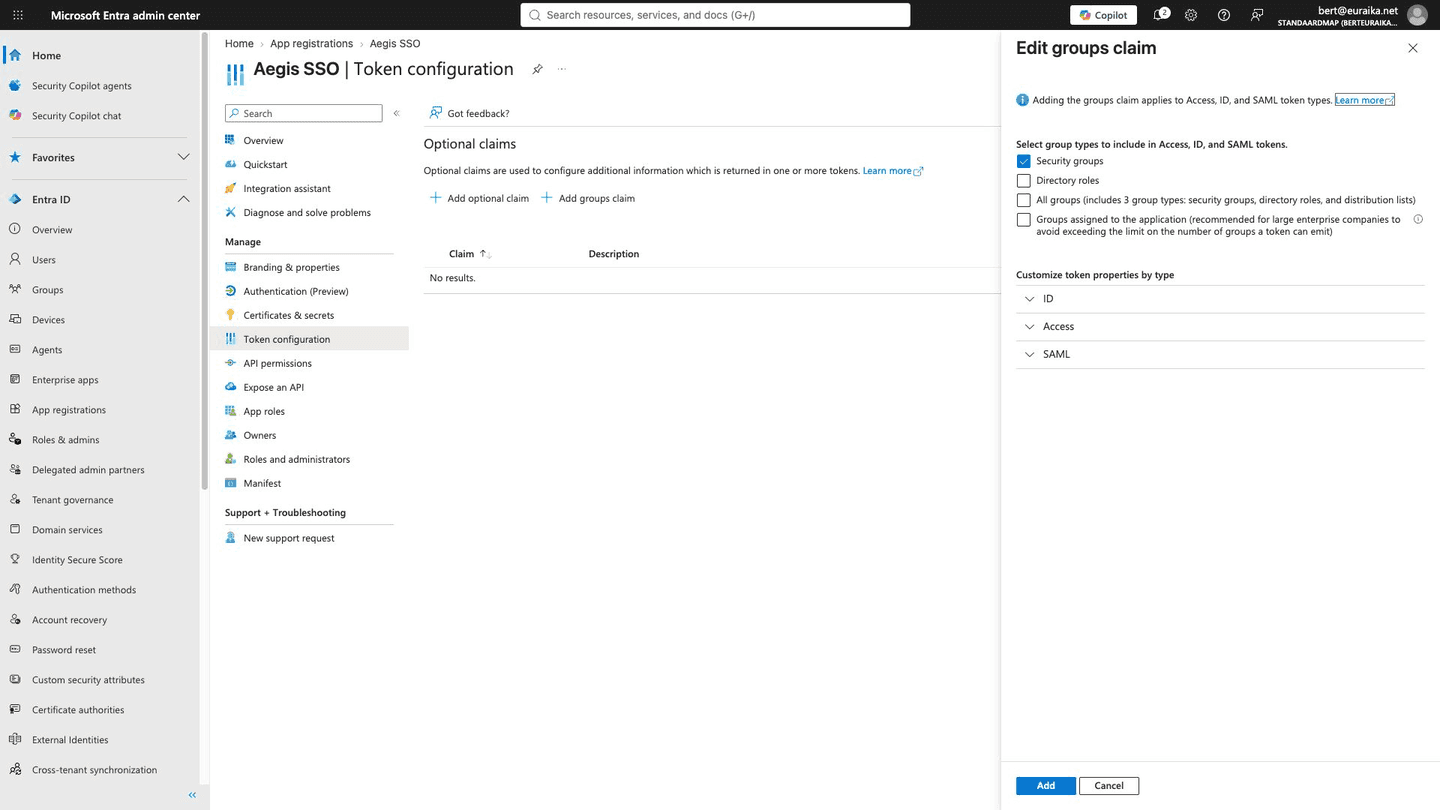
Aegis reads group membership from the ID token itself — it never calls back into
Microsoft Graph. Entra does not include groups by default, so switch them on:
open
Token configuration → Add groups claim, tick
Security groups, and keep the default Group ID format.
No additional API permissions are required.
Two consequences of that Group ID format are worth pausing on.
First, the token carries group object IDs (GUIDs), not display names —
so an Aegis group mapping must contain the GUID, exactly as the previous
chapter's mapping walkthrough shows. Second, do not add a groups
scope in the Aegis dialog — Entra does not accept one, and sign-in
would fail before any consent screen appears. The Aegis dialog reminds you of
both.
Groups assigned to the application in
this panel instead, and assign only the Aegis-relevant groups to the
application.
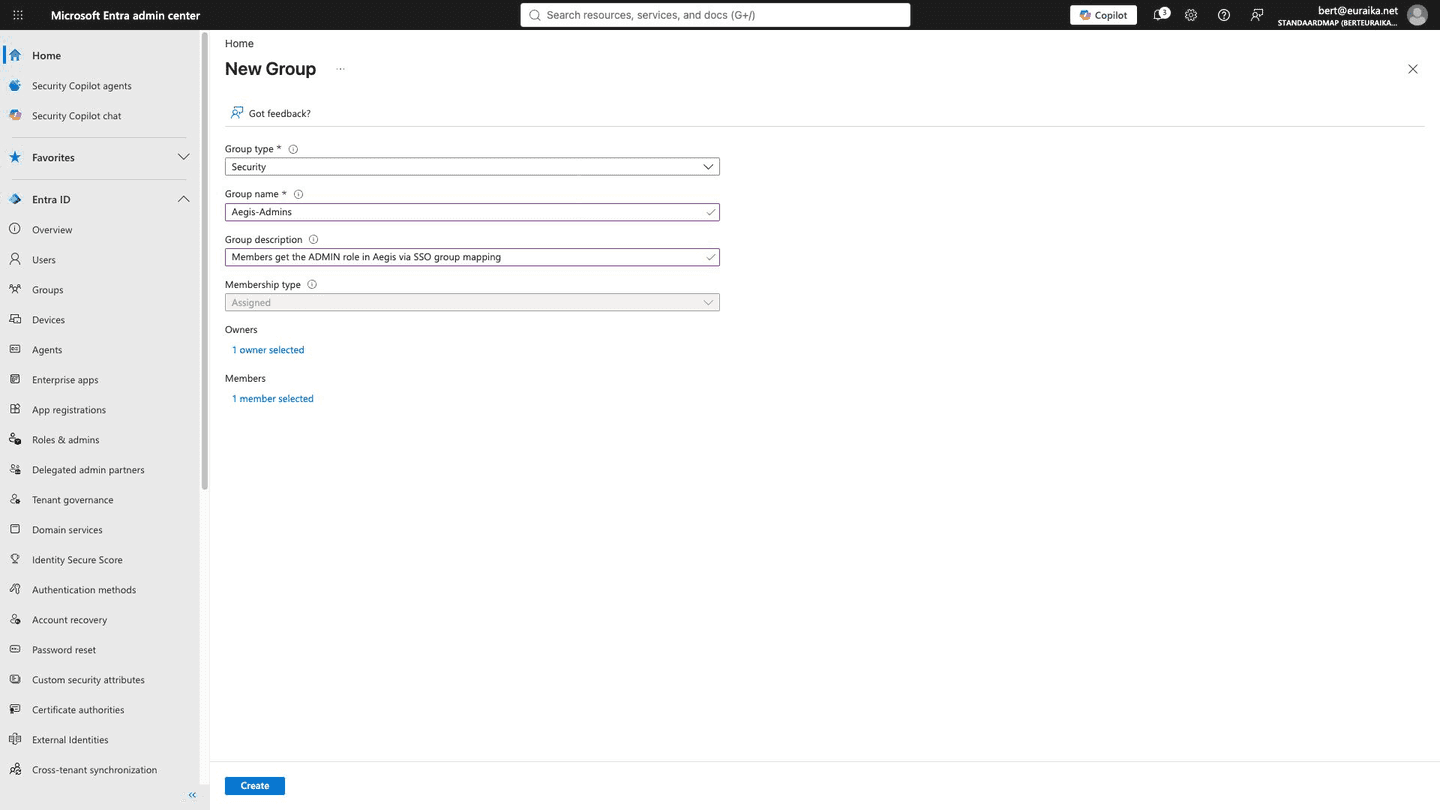
Create the mapping groups
Any existing security group works, but a clean setup uses one group per Aegis
role —
Aegis-Admins, Aegis-Managers, and so on. Under
Entra ID → Groups → New group: type Security,
membership Assigned, then add the right people as members.
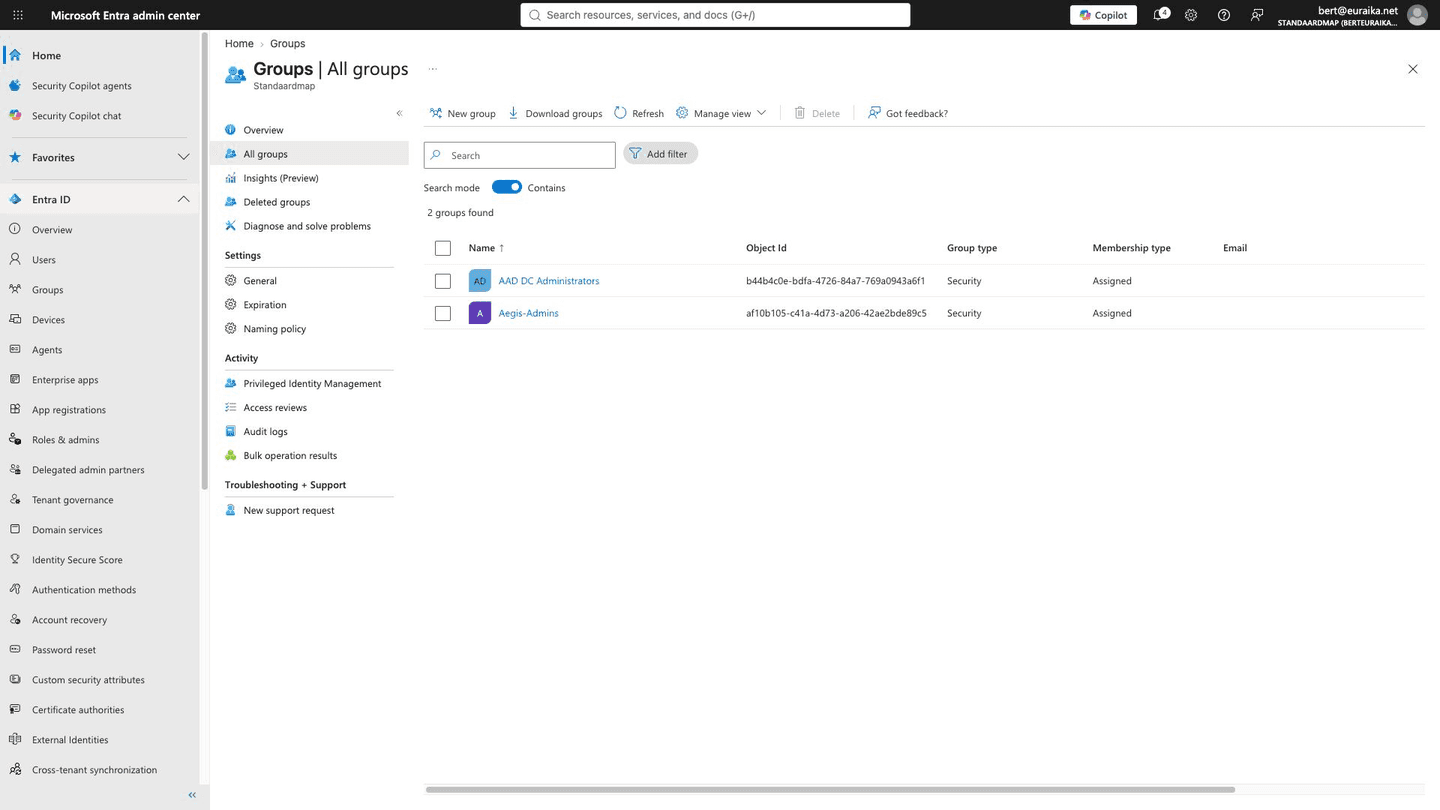
The groups list then shows each group's Object Id — the GUID that
lands in the token and that you paste into the Aegis
IdP Group Name field when creating the mapping.
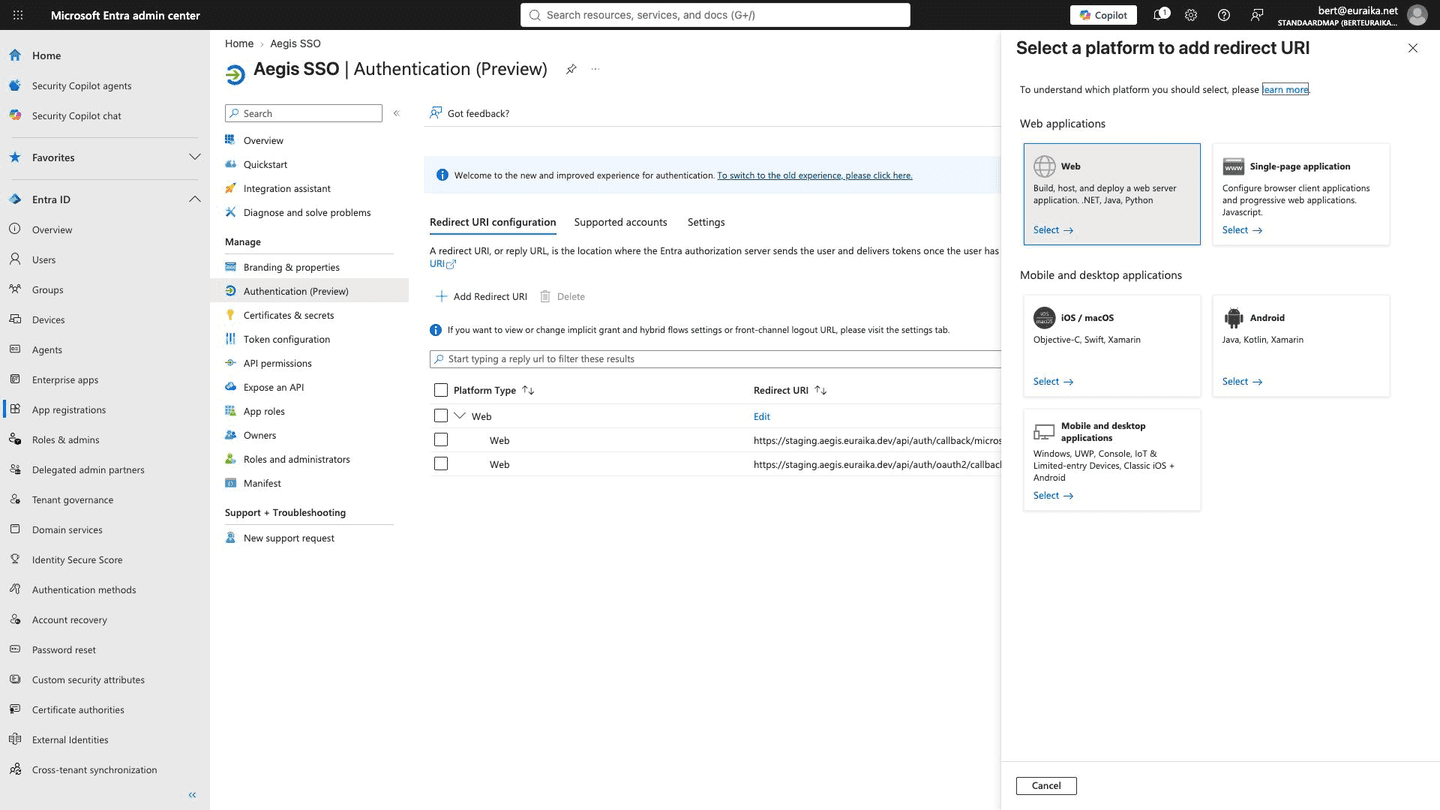
Check the redirect URIs
Back on the registration's Authentication page, confirm the
callback URL you registered matches the one the Aegis dialog shows, character
for character — a mismatch is the single most common SSO failure (Entra reports
it as error AADSTS50011). One registration can carry several
redirect URIs, so staging and production can share an application.
Finish in Aegis and verify
-
In Aegis, open
Settings → Integrations → SSO, selectAdd Provider, and fill the dialog with the Issuer URL, Client ID and Client Secret from above, scopesopenid,profile,email. The provider's sign-in button appears on the sign-in page as soon as you selectCreate— no restart. -
Add a group mapping per role: the group's
Object Idfrom Entra, mapped to the Aegis role. - Sign in from a private browser window with an account that belongs to a mapped group. First sign-in shows Microsoft's consent screen; after accepting, the account lands on the dashboard holding the mapped role, and the sign-in is recorded in the audit log.
- Remove a person from the Entra group and have them sign in again — the role adjusts on every sign-in, so access follows the directory, not a one-off import.
Where this connects
-
What each role can do — the Aegis side of
this setup: the SSO screen, the
Add Providerdialog and group-to-role mappings. - Signing in — what your colleagues see at first sign-in.
- Audit log — every SSO sign-in is recorded there.